How to Clean Pavers with Pressure Washer: Expert Tips
Discover how to clean pavers with a pressure washer effectively, protecting your patio and enhancing curb appeal. Master the technique now!
PRESSURE WASHING PAVERS NEAR ME
6/1/20266 min read
Essential Tips for Pressure Washing Pavers
There is nothing quite like watching years of stubborn algae vanish from your driveway in a single stroke. According to home valuation experts, a sparkling exterior is the most cost-effective way to instantly boost your home's curb appeal. Learning how to clean pavers with pressure washer equipment saves you serious money, transforming a dusty weekend chore into a highly rewarding DIY project.
However, before you power wash paver patio surfaces, you need a solid plan to protect your expensive masonry. What happens if you get too close with a high-powered nozzle? In practice, you risk "etching" the stone—leaving permanent, unfixable swirl marks blasted directly into the concrete. High-pressure water is an incredible tool, but too much force will easily destroy your walkway rather than restore it.
To achieve professional results safely, a successful restoration relies on three core phases: preparing the area, mastering your spraying technique, and applying the proper aftercare. Grab your safety glasses and prepare to revitalize your hardscaping without making costly rookie mistakes.
Gas vs. Electric: Choosing the Right Machine for Your Masonry
Choosing whether to rent a heavy-duty gas unit or buy a consumer electric model depends on understanding PSI and GPM. PSI, or pounds per square inch, acts as your scrubbing force. The best PSI for cleaning concrete pavers stays between 1500 and 2000, which provides enough power to lift dirt without permanently pitting your stone.
Many DIYers ignore GPM, or gallons per minute, but this volume measurement actually rinses the loosened grime away. When comparing gas vs electric power washers for masonry, gas models push a significantly higher GPM. Renting a gas machine saves hours of work on a massive driveway, while buying an affordable electric unit perfectly suits a small walkway.
Finding the ideal pressure washer for patio pavers only solves half the puzzle. You still need to control that intense water safely before pulling the trigger. Your success ultimately relies on mastering the traffic light system: using the right nozzle for every surface.
The Traffic Light System: Using the Right Nozzle for Every Surface
Staring at a handful of colored tips can feel confusing, but they dictate exactly how your machine behaves. Each tip creates a fan spray pattern, spreading water based on specific nozzle degrees. For safe pressure washing brick patio techniques, mastering these angles prevents you from accidentally etching permanent swirl marks into your expensive stone.
While experts often debate using a rotating surface cleaner vs spray nozzle for large driveways, understanding this universal color-coded system is mandatory for standard wands:
● Red (0°): Dangerous. Never use on masonry.
● Yellow (15°): Caution. Good for isolated grime.
● Green (25°): The "Goldilocks" setting. Perfect for general washing.
● White (40°): A gentle fan ideal for rinsing.
Even with the safe green tip attached, distance remains your ultimate safety buffer. Always keep the wand roughly 12 inches above the pavers to prevent surface scarring. However, water pressure alone won't erase every stubborn blemish left by your grill or nature, meaning you need a strategy for attacking oil stains and moss before you spray.
Pre-Treating Your Problems: Attacking Oil Stains and Moss Before You Spray
Water pressure alone cannot fix every problem. When facing stubborn BBQ grease, focus on pre-treating paver stains with detergent. Unlike standard dish soap, specialized driveway cleaners contain surfactants—chemical ingredients that break water's surface tension to powerfully lift trapped oil out of porous concrete.
Rushing this chemical process is a massive mistake. For successfully removing oil stains from driveway stones, you must follow the 10-minute "dwell time" rule. Simply let your soapy solution sit visibly wet on the stain for ten full minutes, giving the chemicals enough time to break down the grime without drying out in the sun.
Sometimes the stone itself creates an ugly blemish. A chalky, powdery white haze on your walkway is called efflorescence, which happens when natural salts rise to the brick's surface. Effective efflorescence treatment for outdoor tiles requires a mild, specialized acidic cleaner to safely neutralize those minerals, since regular detergents will not touch them.
Organic growth demands a different strategy, often prompting the question: how to remove moss from patio cracks? Apply an anti-microbial pre-treatment to kill spores at the root instead of just blasting the green tops off. With your tricky stains thoroughly neutralized, you are ready to master the motion to avoid "zebra stripes" and surface etching.
Master the Motion: How to Avoid 'Zebra Stripes' and Surface Etching
When cleaning pavers with pressure washer wands, rushing the job creates permanent swirl marks and uneven clean lines known as "zebra striping." To avoid these ugly blemishes, adopt a smooth, sweeping motion across the stone. Keep your nozzle about a foot away from the surface, consistently overlapping each pass by fifty percent to ensure no spot is missed.
Directing that water straight down is the quickest way to ruin your patio. Holding the wand at a 90-degree angle acts like a high-powered water drill, blowing out the vital sand between your bricks and permanently etching the stone. Instead, follow the 45-degree angle rule. Tilting your wand forward safely pushes dirt and debris ahead of you rather than digging a trench into your walkway.
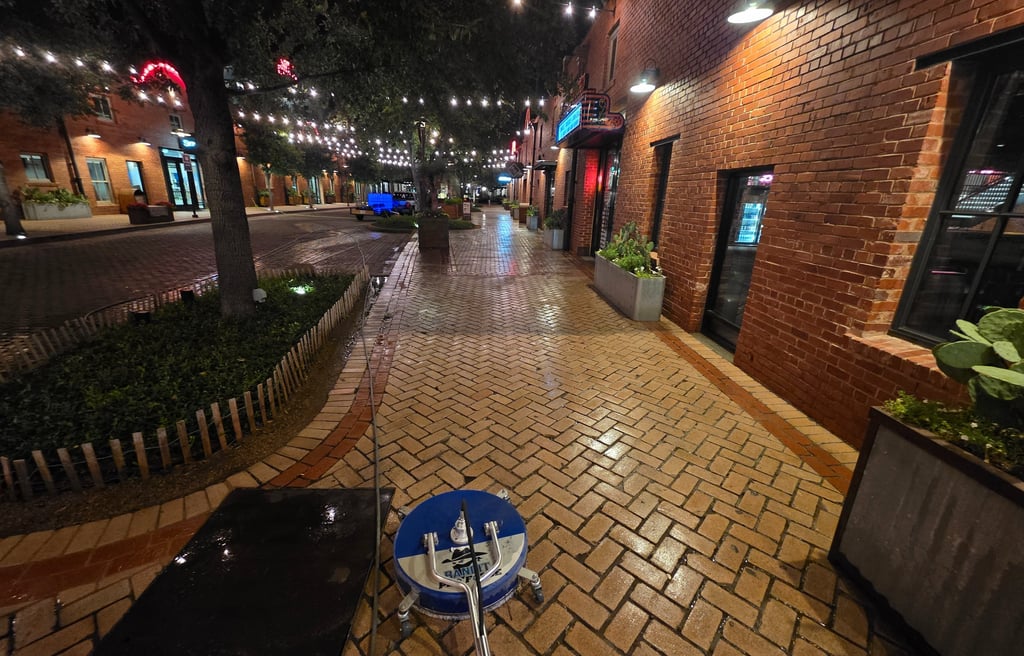
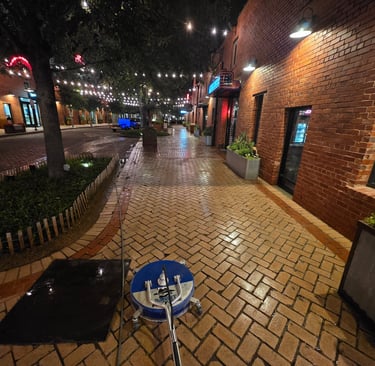
Following a step-by-step patio restoration guide often reveals one major professional secret: upgrading your attachment. Hooking up a rotating surface cleaner cuts your working time by fifty percent while guaranteeing perfectly uniform results. Because the enclosed spinning nozzles maintain a constant height and angle over the concrete, it becomes nearly impossible to create those dreaded zebra stripes.
Even with flawless sweeping technique, high water pressure will inevitably loosen some material between your bricks. Before you celebrate your newly restored stone, you must secure its structural integrity. Standard dirt won't work when refilling those crucial joints, as structural stability requires highly specific binders.
Don't Wash Away Your Glue: Understanding Polymeric Sand
Wondering, will pressure washing damage paver joints? The honest truth is that minor material loss is inevitable when lifting deep grime. Those narrow cracks hold much more than dirt; they provide the vital friction keeping your entire walkway from shifting. Without this crucial filler, your heavy stones will eventually wobble, sink, and crack under pressure.
People frequently ask, can you pressure wash pavers with polymeric sand already installed? Absolutely, provided you respect the material. Unlike basic leveling dirt, polymeric sand contains special binders that harden into a flexible concrete when activated by moisture. It resists weeds beautifully, but direct, high-pressure water streams will still blast it out and ruin your patio's structural integrity.
Gliding your wand at a 45-degree angle minimizes this washout, though a thorough deep clean usually requires polymeric sand replacement after cleaning. Accepting this minor touch-up phase means you can confidently wash away stains without stressing over every lost grain. Once spotless, it is time to lock those joints down permanently with our next phase: Post-Clean Recovery: Re-sanding and Sealing for a 5-Year Glow.
Post-Clean Recovery: Re-sanding and Sealing for a 5-Year Glow
Your patio looks incredible, but rushing this next phase will ruin your hard work. Before attempting any polymeric sand replacement, the entire area must be bone dry. If the deep joints are even slightly damp, new sand will stick to the wet stone walls instead of falling to the bottom. Give your walkway at least 24 hours of clear weather to dry out completely.
Once the surface passes a touch-based moisture test, you can begin filling those empty spaces. This process requires a specific order of operations to lock the stones together securely:
● Ensure the stone is entirely dry.
● Sweep sand into the joints at 45-degree angles.
● Vibrate or tightly pack the joints to remove hidden air pockets.
● Mist lightly with water to "activate" the sand's hardening binders.
Securing the joints is crucial, but finishing the job with a breathable sealer is what truly protects your investment. Protective paver sealing benefits go far beyond a rich, fresh color; they are vital for preventing weed growth after power washing. Breathable formulas specifically allow trapped ground moisture to escape safely, preventing your new finish from turning cloudy or peeling. With your stones now fortified and glowing, keeping them flawless is simple by adopting a smart seasonal routine.
Your Seasonal Patio Maintenance Blueprint
You started this patio restoration guide looking at a grimy surface, and you are leaving with the skills to safely pressure wash pavers without damaging your investment. You now understand how to balance water pressure and technique to protect your stone.
While it is deeply satisfying to power wash paver patio surfaces, your new goal is to keep the heavy machinery put away. A simple semi-annual sweep schedule, paired with a gentle garden hose rinse, prevents heavy organic buildup from taking root in the first place.
Moving forward, your maintenance timeline is simple: plan for a deep clean every two to three years and apply fresh sealer every three to five years. Pay attention during your one-year check-up—if rainwater stops beading on the stone, your protective barrier needs a top coat.
You have successfully transformed a daunting chore into manageable homecare. Fire up the grill and enjoy your pristine backyard, knowing you can now maintain maximum curb appeal with minimal effort.
info@kingdomkleenpowerwashing.com
Phone: 469-645-8552
Get Your Free Quote Now
Service Areas:
Denton, Aubrey, Little Elm, The Colony, Lewisville, Celina, Prosper, Frisco, McKinney, Plano, Allen, Dallas
Proud Member of the North Star Service Alliance
Trusted North DFW Service Professionals.